Roast Pork, called “Siew Yok” in cantonese, is so readily available in Malaysia that there really is no necessity to learn how to cook it. I am also not a good cook and not even the most discerning foodie and so I’m probably the best person to share this recipe. Basically, anyone can do this if they wanted to. I used a recipe by Mrs Fairly Yee but I have experimented so many times with different meats, ovens, temperature and size of the pork, conditions of the skin, that I am able to add tips that I believe will be very helpful. So we got into learning how to cook siew yok because it’s hard to find it where our children are currently living in the USA. So this was really out of “necessity” :p
NOTE: The first 6 photos in this recipe are the best size of pork to be used. I added these photos to show the marinating process. PLEASE DO NOT CUT THE PORK INTO STRIPS AS IT IS BETTER COOKED WHOLE. The 7th photo is what I actually cooked on the day I took the photo and what was available at the butcher was just the pork strips, so I had to place them together in a pan.
RECIPE CREDITS: This recipe was created by our friend, Ervinn Siew’s aunt, Mrs. Fairly Yee, who has an entire book of her favourite recipes published but circulated privately. I do not have that book.
- GET A REALLY GOOD PIECE OF PORK
In Kuala Lumpur, most people talk about getting it from a butcher in Taman Tun Dr Ismail market. I have never been there but have tasted siew yok made from his meat. I feel that the one I get from Daily Choize at 21 Jalan Radin Bagus 5, Sri Petaling, 57000 Kuala Lumpur; Pearl Pork (珍珠肉) is better. This is supposedly free from beta agonist and antibiotics. Both of us think like that there is absolutely no boar taint after cooking. This is also a lot more tender although you pay the price for it.
So I normally buy one or two pieces of pork, marinate it immediately upon arriving home, then place them into a zip lock bag and throw them into the freezer. That way I can have roast pork anytime I fancy. I have had frozen meat left in the freezer for up to 3 months without any issues.
2. What you need
For Marinating :
a) Chinese cooking wine;
b) Salt and soy sauce;
c) 5 spice powder;
d) Pepper (optional since there is peppercorn in 5-spice powder already);
e) Garlic – cut into long strips. You will need a minimum of 8 strips. Photo 1 shows the cut garlic strips.
For first part of cooking:
a) Salt (fine and coarse);
b) a sauceplate of water;
Equipment:
a) Turbo Broiler oven – I have used a normal free standing convection oven, a big fan assisted oven and the humble turbo broiler and the best result is from the turbo broiler. I think the focused, concentrated, and evenly distributed heat in a small area works best;
b) 2 Oven Trays of the same size;
c) Tray stand and tray handle.
3. PREPARATION:
i) Wash meat and immediately pat dry with kitchen paper towel;
ii) Ensure the skin is clean of hair;

Photo 1 – Ingredients for marinating
iii) Turn the meat around (skin facing down) and scour 2 lines about 1/3 and 2/3 of the width. Do not scour right up till the end – you can see the lines clearly in photo 3 below.
iv) Rub salt, five spice powder, pepper, soy sauce, and chinese wine over the meat. Try not to get any of the ingredients especially the five spice powder onto the skin. Best way is to place ingredients onto the palm of your hand and rub onto the meat a bit at a time. This also ensures even marinating. Go easy on the salt and five spice powder. How much you use really depends on your taste.
v) With a paring knife, make a hole at sides of the meat and push in 1 slice of garlic. Repeat around the meat. Minimum should be 2 holes per side. For a big piece of meat, I also insert into the scoured areas. Refer to Photos 3 and 4. Some people ask why not just marinate the entire meat with chopped garlic instead. Well, I figure that the garlic will then be burnt.
vi) Once done, wash hands, then hold meat up with the skin facing up, use a kitchen paper towel to wipe clean and dry. Then place into a zip lock bag and you can leave it in the freezer till you are ready to cook. If you are cooking the following day, just leave it in the fridge. Remove from plastic bag and leave UNCOVERED in the fridge for a minimum of 2 hours and a maximum of 5 hours. This is to help dry up the skin. Be careful not to leave it for too long as the skin may be over dried (Fridge burn). Remove from fridge at least an hour before cooking so that the meat is at room temperature.

Photo 2 – Scour lines and how to insert garlic into meat

Photo 3 – inserting the garlic strip into the side of the meat

Photo 4 – inserting the garlic strip into the centre of the meat

Photo 5 – Hold up the meat with the skin face up, wipe clean and place in zip lock bag

Photo 6 – Placing marinated pork into zip lock bag, making sure the skin remains dry and clean
4) COOKING
Please note that this photo below (Photo 7) is a DIFFERENT PIECE OF MEAT FROM PHOTO 6 – This was purchased in strips as the shop did not have a block of pork. This is not the best way to cook roast pork but I tried and it still works. If you have a block of meat, DO NOT cut into strips for roasting.
i) Place meat into any baking pan that will fit the meat and which can fit into the oven. Push meat as close as possible and try to push all excess side meat in so that it is UNDER the skin and NOT EXPOSED;
ii) Use fine salt to cover over the skin. If you are worried about the salt falling to the sides, use a spatula to help as a “wall” beside the meat. Then pat down the fine salt to compact it and add more salt so that it is a thicker layer. This is to protect the skin from cooking too early. Refer to Photo 9.
iii) After you are satisfied that every part of the skin is adequately covered, use some coarse salt on top. This is to prevent the fine salt from “flying off” when the oven is on. Almost all ovens come with fan assist now and it can blow off the fine salt. Refer to Photo 10.

Photo 7 – Place the strips of meat as near to each other as possible and do not allow any part of the meat to be exposed.

Photo 8 – Utensils you may want to have

Photo 9 – Cover the skin with fine salt and pat down to compact it, then add more salt to make sure it completely covers and protects the skin

Photo 10 – Use coarse salt as a “weight” to cover over the fine salt so that the fan in the oven will not blow off that layer of salt.

Photo 11 – Meat in center of oven
iv) Put a small sauce plate of water under the tray stand. This is to keep the meat moist while cooking.
v) Carefully place the meat inside the oven, taking pains to ensure it is centralised for even cooking.
vi) Cook at 1 hour at 170 – 175C. For bigger pieces of meat that has a lot of fat, I would add another 5 – 8 mins which means the temperature should be 170C instead. Do not be tempted to increase the heat for a shorter time. The idea is to slow cook it so that the fats will “melt in your mouth”. Note that if your meat is not at room temperature, or if it is a smaller or thinner piece of meat, or if you are using a different oven, you will probably get different results. The timer has a maximum of 1 hour, so if I need to add time, I normally add it back to a full hour after 10 mins to make sure I don’t forget.

Photo 12 – 1 hour timer at 170 – 175C

Photo 13 – Meat is cooking! Phase 1
vii) Remove from the oven when the timer goes off. Remove the salt from the meat carefully so that it doesn’t “stick” onto the meat or you will get a VERY salty piece of roast pork. If you do not want to use the excess lard from this first cooking, just remove the bigger pieces of salt and then just brush off the remnants.
viii) Carefully remove the meat from the tray and place into the second clean tray. Observe the level of the skin. Most of the time you will have to place something underneath to raise part of the meat. The more level the meat is, the better the crackling. Refer to Photo 16

Photo 14 – Removing salt completely from the skin and sides of the meat

Photo 15 – Using tongs and a brush to flick off the fine salt
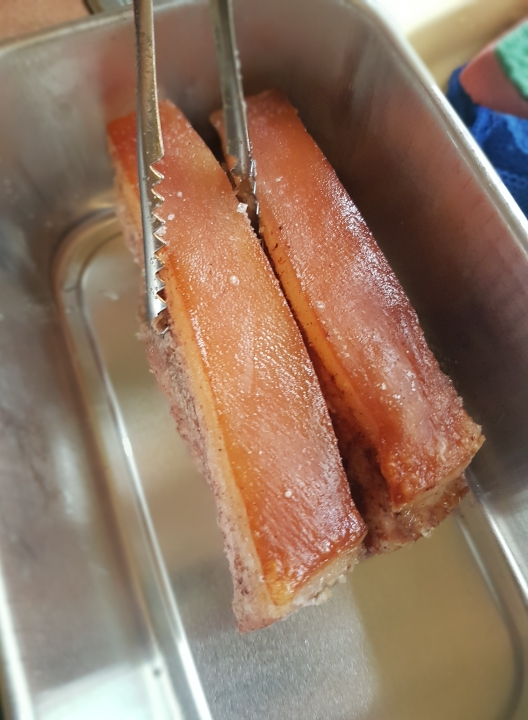
Photo 16 – Place cooked meat back into another pan for crackling the skin – you may have to place a small spoon underneath to ensure the skin is evenly exposed to the grill
viv) Place back into the oven carefully and again, ensure the meat is centralised. Temperature will be at a maximum of 250C. Set the timer to 10 mins but keep watch. Adjust the meat the moment you notice a pooling of oil on the skin because of unevenness. Keep readjusting the position of the tray if necessary. If the crackling is even and completely done, remove immediately from the oven and leave to cool down on some kitchen paper towel to absorb excess oil. I suggest you do not cook for more than 15 mins for this part even if not all the skin has crackled. Prolonged grilling will cause the crackle to be too hard. You can see from Photo 19 that this particular piece had some parts right in the centre that did not crackle but it’s better to have that than to have the entire crackle hard as stone.

Photo 17 – Into the oven for round 2 – 10 mins at full 250C
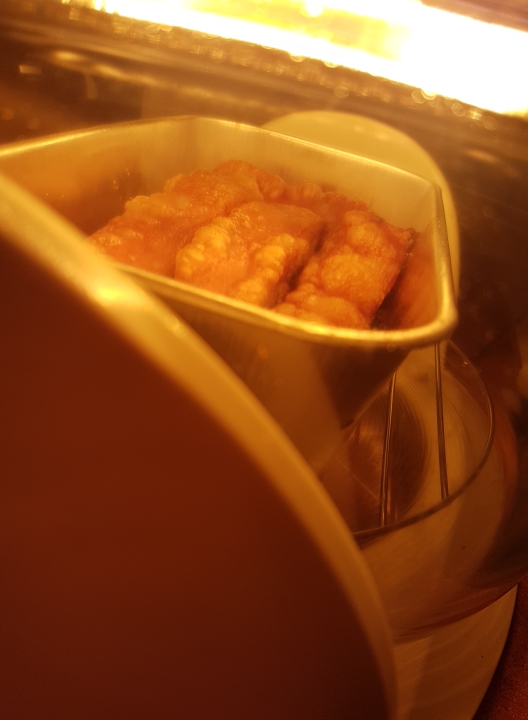
Photo 18 – Watch with expectations!!

Photo 19 – Remove from oven to cool down before cutting
ENJOY!!!!

Photo 20 – Pour and store excess oil from the baking tray into a glass jar to be kept for future use – this is great for wantan mee!

Leave a comment